
If you’re evaluating resins for directly 3D-printed clear aligners, you’ve likely hit a confusing line in someone’s technical datasheet: “nitrogen curing required.” What does that mean, why do some materials need it, and — most importantly — do you?
What nitrogen curing actually is
Most dental resins cure in two stages: the printer’s UV light builds the shape, and a post-curing chamber finishes polymerization. During post-curing, oxygen in the air inhibits the reaction at the material’s surface, leaving a microscopically under-cured outer layer.
Nitrogen curing solves this by flooding the curing chamber with nitrogen gas, displacing oxygen so the surface cures as completely as the interior. The result: maximum surface hardness, better clarity, and more complete mechanical properties.
Why some aligner resins require it
Direct-printed aligners live in the mouth for 1–2 weeks per stage, flexing on and off teeth daily. That demands a rare combination: optical clarity that doesn’t yellow, elastic recovery across hundreds of insertion cycles, and biocompatible fully-cured surfaces.
Some resin chemistries can only hit all three targets with an oxygen-free cure. For those materials, the nitrogen chamber isn’t optional — skip it and you get a hazy surface, weaker mechanics, and potential biocompatibility questions. The datasheet means what it says.
What nitrogen curing costs you
A nitrogen curing setup is not a minor accessory:
- The chamber itself — a dedicated unit costing thousands of dollars, occupying bench or floor space most labs don’t have spare.
- The gas supply — nitrogen tanks or a generator, plus delivery contracts, regulators, and safety compliance.
- Ongoing operation — every cure cycle consumes gas; every tank swap interrupts workflow.
For a lab or clinic building aligner capacity, our testing shows a single clinical treatment course run on a nitrogen-curing workflow carries over a thousand US dollars in additional cost versus a standard-cure alternative — before counting the chamber purchase and installation at all.
The alternative: resins engineered for standard curing
Not every aligner resin needs nitrogen. It comes down to formulation chemistry: resins engineered with oxygen-tolerant photoinitiator systems and color-stable monomers can reach their target clarity, elasticity, and surface cure in a conventional curing unit — the standard oven or light chamber your lab already owns.
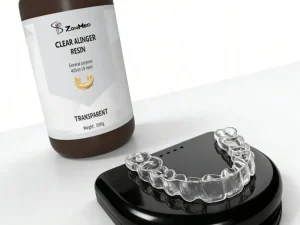
R-14, our direct-printed clear aligner resin, was formulated for exactly this. It cures in a standard unit in 3–5 minutes with no yellowing, no nitrogen chamber, no gas contracts, and no specialized operator training. The validated printer parameters ship with the product, so the workflow your lab already runs is the workflow R-14 needs.
The practical difference for a lab: one workflow requires buying, installing, feeding, and maintaining a gas-hungry machine. The other starts printing on equipment you already have.
How to decide for your lab
Ask three questions of any aligner resin you’re evaluating:
- Does the datasheet require nitrogen? If yes, price the full system — chamber, gas, maintenance — not just the resin bottle.
- What does “standard cure” achieve? Ask for clarity and mechanical data specifically from standard-cure protocols, not nitrogen-cure protocols.
- Run the per-course math. Multiply the consumable and equipment cost across a full treatment course. The resin price per kilogram is only one line of the equation.
Nitrogen curing isn’t good or bad — it’s a cost. The right question was never “which cure is better” but “what does each cure cost me per case, and does the result justify it?” For labs that answer with arithmetic, the standard-cure option increasingly wins.
Related reading:
- R-14 Clear Aligner Resin — product details
- Become a distributor — R-14 exclusive partnerships for the US & EU
Evaluating aligner resins for your lab? Request an R-14 sample and run the per-course cost comparison on your own equipment.